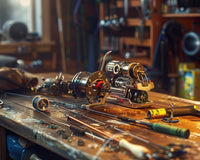
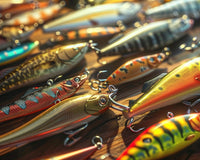
Fly tying is a practical way for New Zealand anglers to create custom flies that match local waters and fish species. It allows you to adapt your gear to changing conditions and experiment with materials.
What is Fly Tying?
Fly tying means making flies from thread, feathers, and other materials to copy the bugs and baitfish that fish eat. These flies natural insects, baitfish, and other life to attract fish. Instead of relying solely on store-bought options, anglers can personalise their patterns to suit seasonal hatches and regional species.
The Importance of Mastering methods
Learning how to tie flies properly helps you fish more effectively. Neat, strong flies are more durable and look more realistic in the water. Whether you're chasing trout or kahawai, strong leads to better presentation—and more hook-ups. It also lets you respond to changes in insect life or water conditions using patterns tailored to your area.
Essential methods
Technique 1: Using Fishing Knots
Knots are the of fly tying. The whip finish and half hitch are essential for locking thread in place. Beyond tying, knots like the clinch knot or loop knot strong connections between fly and tippet. Precision in knotting prevents unraveling and improves durability.
Technique 2: Incorporating Fly Tying Beads
Beads add weight, shine, and realism. Tungsten or brass beads help your nymphs sink quickly to the strike zone. Coloured beads can insect heads or add contrast. Slide the bead on before you start the thread base, and match the size to your hook gauge.
Technique 3: Adding Fly Tying Weights
Beyond beads, you can add weight using lead or non-toxic wire. Wrap the wire at the fly’s core to build and with sinking. Weights are key when targeting deep pools or fast-flowing water. They also help balance flies tied on heavier hooks.
Technique 4: Creating Realism with 3D Eyes
3D eyes are a simple yet powerful for baitfish patterns. Secure with adhesive or epoxy to loss during casting. Eyes help make the fly look like a real baitfish. They're often used in saltwater or lake fishing to get more strikes. You can also use see-through materials to make the fly look more real.
Technique 5: Utilising Fish Masks
Fish masks shape the front of the fly and help it last longer. They're useful for streamers and larger flies where a solid head is needed. Pair with 3D eyes and synthetic fibres like EP or SF blend for strong, baitfish patterns.
Tools of the Trade
Essential Fly Tying Tools
You don’t need a cluttered bench to start tying—just the right tools:
- Vise: A sturdy, vise is the centrepiece of your setup.
- Bobbin: Keeps thread under tension and in control.
- Scissors: Fine-tipped, razor-sharp scissors for precision cuts.
- Bodkin: For teasing fibres and applying cement.
- Whip finisher: For neat, knots.
Vise and Its Importance
Your vise needs to firmly hold various hook sizes without slipping. A rotary vise allows more fluid tying and better material control. Choose one with durable jaws and good .
Headband Magnifier for Detail Work
A headband magnifier can help with small flies by making it easier to see details and reduce eye strain.
Tool Bar Setup for Efficiency
Organise your workspace with a tool bar or magnetic tray. Keeping your bobbin, scissors, and bodkin within easy reach speeds up your tying and maintains flow.
Choosing the Right Fly Tying Materials
Focus on versatile materials that suit NZ waters:
- Dubbing for bodies
- Hackle and feathers for motion
- Flash and tinsel for visibility
- Rubber legs and synthetic fibres for movement
Advanced Materials
Using Dubbing for Texture
Dubbing creates lifelike buggy bodies. Use hare’s ear or synthetic blends to add and trap air bubbles. Apply lightly and evenly for natural texture.
Working with Feathers for Motion
Soft feathers move well in the water. They can make your fly look more natural and increase your chances of catching fish. Secure fibres loosely and test them in water to proper action.
Incorporating Luminous Thread for Visibility
Luminous or glow-in-the-dark thread can flies for low-light or murky water. A subtle underbody of glow thread can increase strikes without looking unnatural.
The Role of Mylar Tubes in Flies
Mylar tubes form the base for tube flies, used in saltwater and streamer patterns. They allow easy and multiple uses per pattern. Great for targeting larger species in tidal waters.
Adding Insect Wings for Realism
Fake wings can help dry flies float and look more like the insects fish feed on. Ensure and correct angles for a natural silhouette.
Crafting with Tinsel and Rubber Legs
Tinsel provides flash; rubber legs add action. Use them sparingly for realism or boldly for attractor patterns. Match colours to known hatches.
Experimenting with Dragon Tails
Dragon tails are soft, flexible materials that move naturally in the water. They are easy to use and for big flies in lakes or estuaries. Their motion attracts fish even with minimal effort from the angler.
Types of Flies and Matching the Hatch
Understanding Fly Types
There are four main types of flies you can tie:
- Dry flies: These float on the surface and adult insects.
- Wet flies: Designed to sink below the surface, they drowned insects or emerging bugs.
- Nymphs: These the immature stages of insects and are fished below the surface.
- Streamers: Larger patterns that baitfish, leeches, or large swimming insects. Ideal for targeting predatory species.
Each fly type is suited to different fishing situations. In fast-flowing rivers, nymphs and weighted wet flies are used. For calm surface feeding, dry flies are the top choice.
Matching the Hatch in New Zealand
"Matching the hatch" means choosing or tying a fly that resembles the insects fish are feeding on at that time. In New Zealand, this often means matching mayflies, caddisflies, or damselflies. Watch the water for insect activity, and try to size, shape, and colour.
In regions like Canterbury and Central Otago, lighter mayfly patterns work well in summer. On the West Coast, where conditions are wetter and darker, darker flies are often more successful.
Storage and Organisation
Keeping Your Fly Tying Bench Organised
Efficient fly tying starts with good organisation. Use plastic drawer units, stackable trays, or labelled jars to materials. Foam boards with labelled hooks can help store finished flies. Keep thread spools on a dowel rack to avoid tangling.
Travel-Friendly Options
If you tie while travelling, compact fly tying kits with built-in tool holders and foldable vises are available. A small fly box with labelled compartments makes it easy to carry a selection of your tied flies on trips.
NZ-Specific Fly Patterns
Certain fly patterns are especially in New Zealand waters:
- Humpy: Great for fast water, this dry fly is visible and buoyant.
- Green Caddis Nymph: Common in NZ rivers, for larvae.
- Pheasant Tail Nymph: A classic pattern that mimics various nymph stages.
- Woolly Bugger: A versatile streamer used widely for both rivers and lakes.
These patterns are a great starting point for Kiwi anglers learning to tie.
Tips and Tricks
Best Practices for Fly Tying
- Start with simple patterns and perfect your .
- Always match hook size with material proportion.
- Keep materials tidy and your bench clean.
- Watch tutorials and tie along.
- Use labels or small trays to keep materials organised and easy to find.
Common Mistakes to Avoid
- Using too much material, leading to bulky, unrealistic flies
- Poor thread control—wraps should be smooth and even
- Skipping head cement or finishing knots, which causes flies to unravel
- Not testing flies in water to see how they move
- Tying too many new patterns without mastering the basics
Final Thoughts
Fly tying is a practical skill for anglers wanting more control over their fishing setup. Mastering methods like using fishing knots, adding weights, and incorporating realistic materials can lead to more flies and better results on the water. The more you practise, the more confident and you’ll become.
Keep experimenting with materials, patterns, and local hatches to see what works best. Fly tying is a cost- and rewarding way to prepare for your next trip on the river or lake.
At HOOK LINE SINKER, we offer high-quality FLY TYING, BEADS & WEIGHTS, FLY TOOLS, EYES & MASKS, and MATERIALS for every part of your crafting.
Happy Fishing! 🎣


